Factory resetting a Lenovo laptop can help if you face performance issues or want to start fresh. Windows 11 offers built-in options to make this task easier, ensuring your Lenovo device returns to its factory state. This article will guide you through the steps to factory reset Lenovo laptops.
A factory reset restores your Lenovo laptop to its original settings, just like when you first bought it. This process erases all personal files, apps, and changes made over time. People might do a factory reset to fix problems, clear out clutter, or prepare the laptop for a new owner. It’s a way to start fresh or ensure the laptop works smoothly again.
Steps to Perform a Factory Reset on Lenovo Laptop
To factory reset a Lenovo laptop, you can follow the steps below:
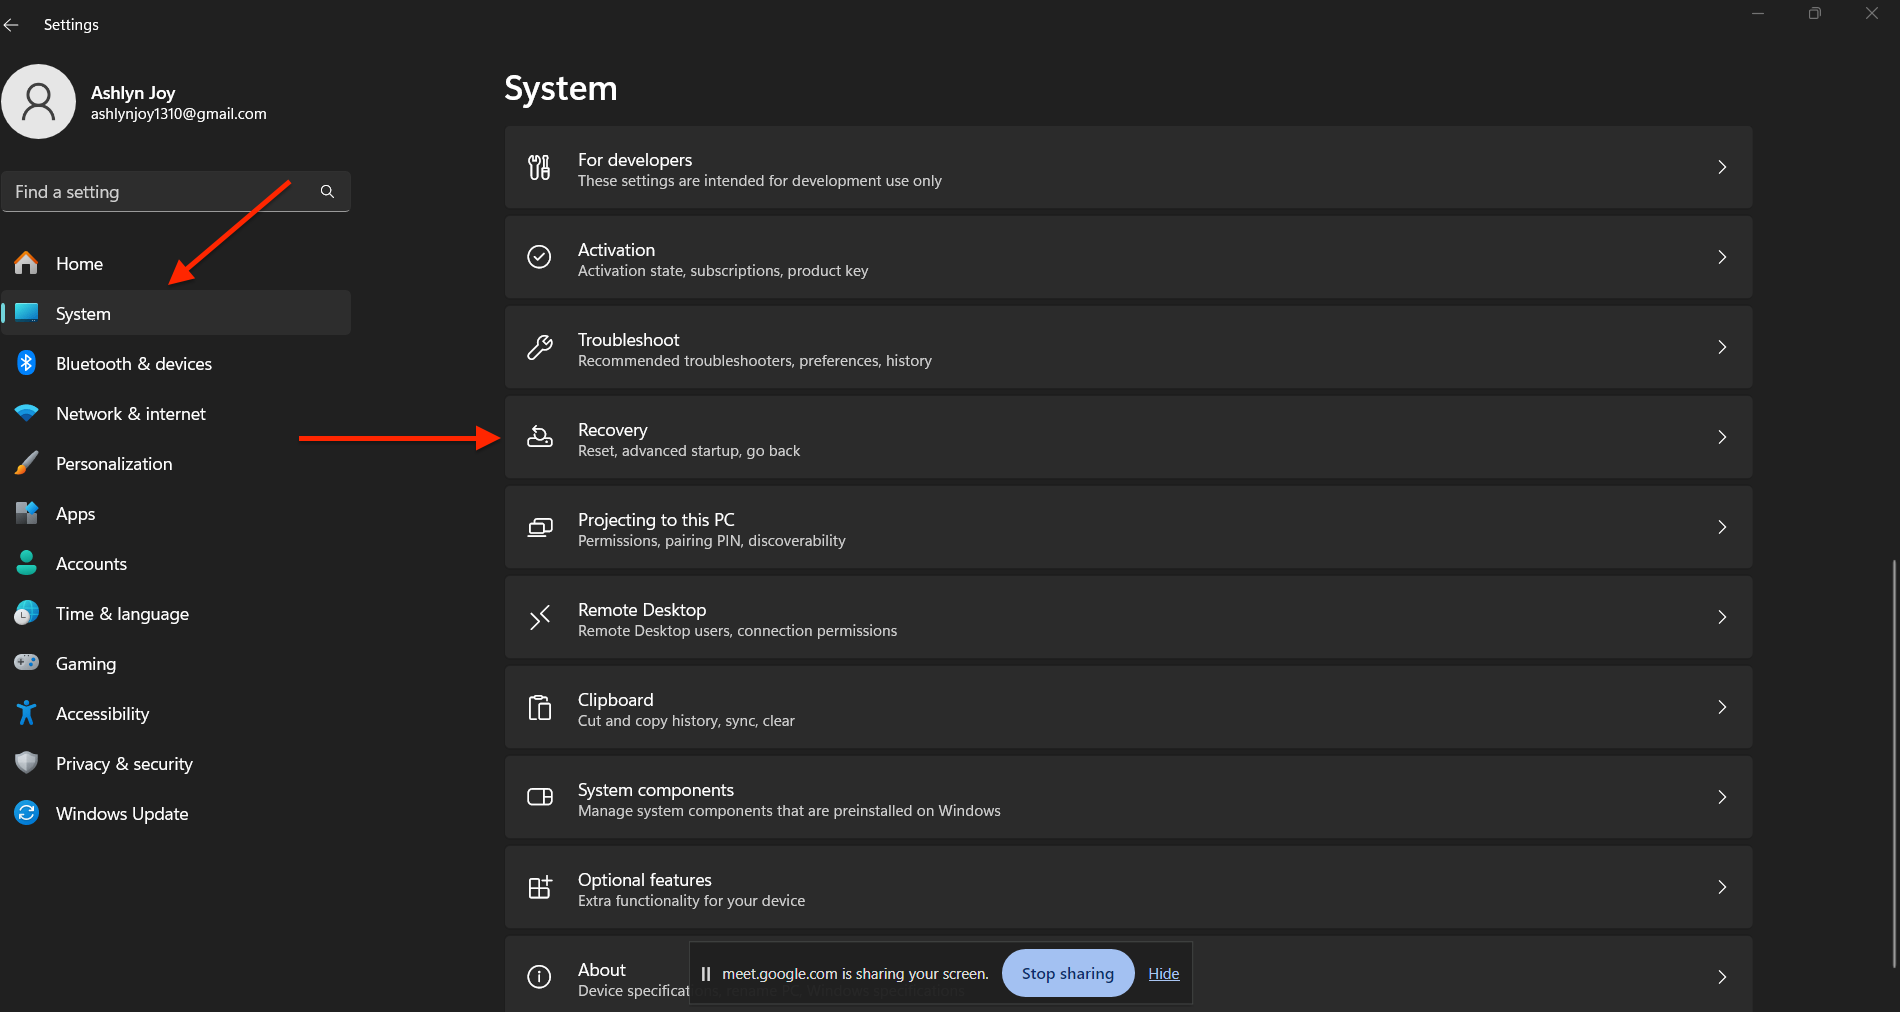
- Access the Settings Menu: Open the Start menu and select Settings.
- Navigate to Recovery Options: In the Settings window, go to System, Scroll down, and click on Recovery.

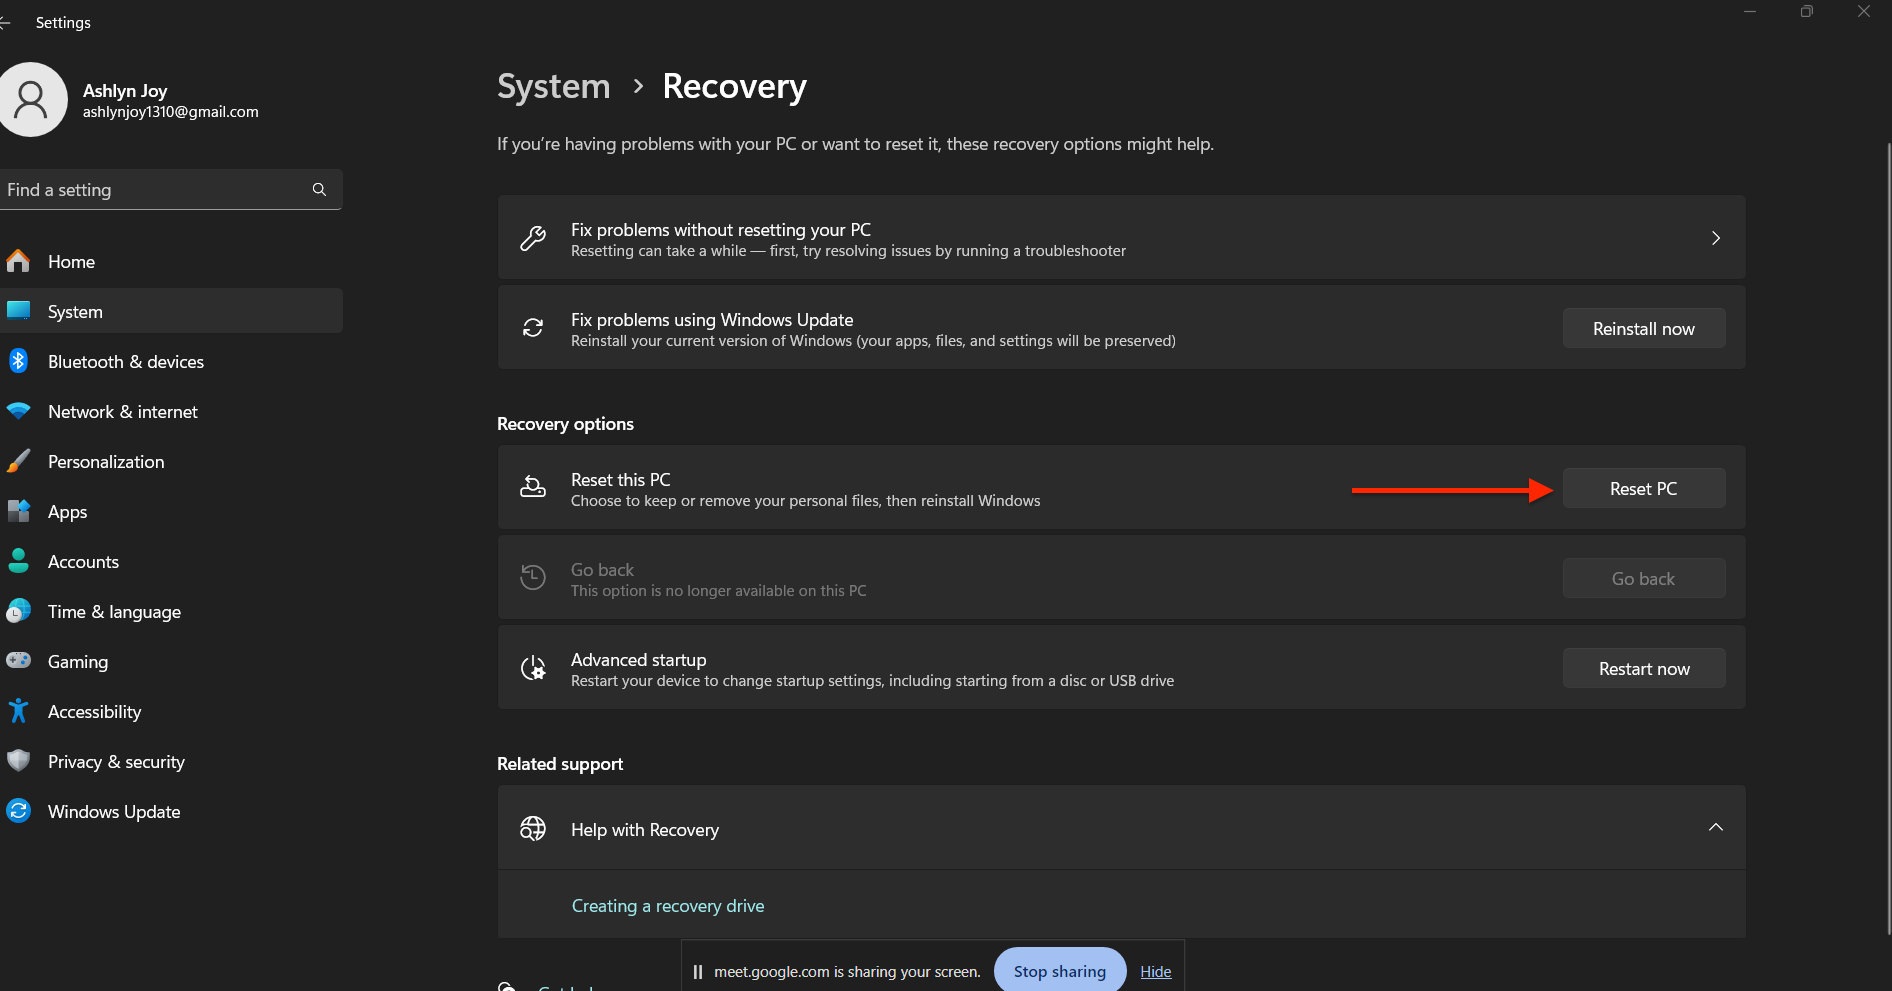
- Start the Reset Process: Click on Reset this PC under Recovery options.

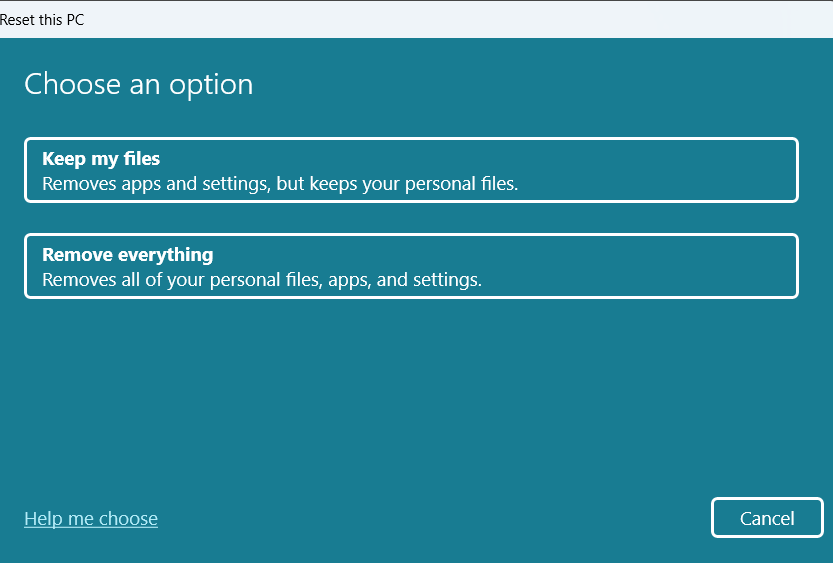
- Choose How to Reset: You can keep your files or remove everything. Select Remove Everything for a complete factory reset.

- Select Your Preference: You will then decide whether just to remove your files or remove files and clean the drive. If you plan to give away or sell the laptop, choose Remove files and clean the drive, as this is more secure.
- Confirm and Reset: Review your choices and click Reset.
- Wait for the Reset to Complete: The laptop will restart and begin the reset process. Depending on your system, this may take some time.
- Set Up Windows: After the reset is complete, your laptop will restart again, and you’ll be guided through the initial Windows setup.
However, since a factory reset will delete all your personal data, it’s important to back up any important files before you begin. This way, you can ensure that nothing valuable is lost during the reset. By following these steps, you can easily reset your Lenovo laptop and enjoy a smoother, problem-free experience.


